
Classic Cherry Delight
Classic Cherry Delight is one of those timeless desserts I’m truly grateful to share with you. Thank you for being here and for loving the kind of no-fuss…
 By Amanda DavisDEC 18, 20255 MIN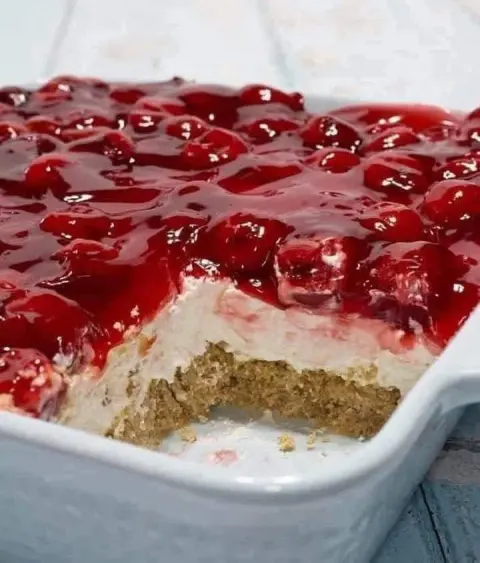
Ingredients
Instructions
- In a bowl, mix graham cracker crumbs and melted butter until fully combined. Press firmly into the bottom of your dish to form an even crust. Chill in the refrigerator for 15 minutes.
- In a medium bowl, beat the softened cream cheese until smooth. Add powdered sugar and vanilla extract and mix until creamy and lump-free.
- Gently fold the whipped topping into the cream cheese mixture until light and fluffy.
- Spread the cream cheese mixture evenly over the chilled crust.
- Spoon cherry pie filling evenly over the cream layer, spreading gently to the edges.
- Refrigerate for at least 2–3 hours, or until fully set.
Classic Cherry Delight is one of those timeless desserts I’m truly grateful to share with you. Thank you for being here and for loving the kind of no-fuss, nostalgic recipes that instantly bring smiles to the table. This dessert is creamy, cool, lightly sweet, and topped with that gorgeous ruby-red cherry layer we all know and love. I promised you classics that never go out of style—and this one proves exactly why it’s been a favorite for generations.
Before we dive in, don’t forget to subscribe to my email list so you can receive this recipe and all my cherished retro desserts straight to your inbox. Simple sweets, made with heart.
Classic Cherry Delight Overview
This Classic Cherry Delight is a no-bake layered dessert featuring a buttery graham cracker crust, a fluffy cream cheese filling, and a glossy cherry pie topping. It’s light yet rich, perfectly balanced, and ideal for holidays, potlucks, family gatherings, or anytime you need a guaranteed crowd-pleaser.
Reasons to Love Classic Cherry Delight
There are so many reasons this dessert stands the test of time:
- No baking required
- Simple, affordable ingredients
- Perfect make-ahead dessert
- Light, creamy, and refreshing
- Loved by all ages
Anything but boring!!
What Does Classic Cherry Delight Taste Like?
It’s cool, creamy, and lightly tangy from the cream cheese, with a sweet buttery crunch from the graham cracker crust. The cherry topping adds just the right pop of fruity sweetness that ties everything together. Every bite is smooth, nostalgic, and downright comforting.
Benefits of Making Classic Cherry Delight
Beyond tasting amazing, this dessert is incredibly practical:
- Minimal prep time
- No oven needed
- Easy to transport
- Stays beautiful when sliced
- Perfect for busy schedules
Ingredients for Classic Cherry Delight
Here’s everything you’ll need to make this beloved dessert:
Crust
- 1 1/2 cups graham cracker crumbs
- 1/2 cup unsalted butter, melted
Creamy Layer
- 8 oz cream cheese, softened
- 1 cup powdered sugar
- 1 teaspoon vanilla extract
- 1 cup whipped topping (Cool Whip), thawed
Topping
- 1 can (21 oz) cherry pie filling
Tools Needed for Classic Cherry Delight
You’ll only need basic kitchen tools:
- Medium mixing bowls
- Spoon or hand mixer
- 9×9-inch or 8×8-inch dish
- Measuring cups and spoons
- Spatula
Ingredient Additions and Substitutions
This Classic Cherry Delight is wonderfully flexible:
- Swap cherry pie filling for blueberry or strawberry.
- Use a pre-made graham crust to save time.
- Add lemon zest to the cream layer for brightness.
- Use homemade whipped cream instead of whipped topping.
- Make individual servings in cups for parties.
How to Make Classic Cherry Delight Step by Step
Step 1: Make the Crust
In a bowl, mix graham cracker crumbs and melted butter until fully combined. Press firmly into the bottom of your dish to form an even crust. Chill in the refrigerator for 15 minutes.
Step 2: Prepare the Cream Layer
In a medium bowl, beat the softened cream cheese until smooth. Add powdered sugar and vanilla extract and mix until creamy and lump-free.
Step 3: Fold in Whipped Topping
Gently fold the whipped topping into the cream cheese mixture until light and fluffy.
Step 4: Assemble
Spread the cream cheese mixture evenly over the chilled crust.
Step 5: Add Cherry Topping
Spoon cherry pie filling evenly over the cream layer, spreading gently to the edges.
Step 6: Chill
Refrigerate for at least 2–3 hours, or until fully set.
What to Serve with Classic Cherry Delight
This dessert pairs beautifully with:
- Coffee or tea
- Holiday dessert spreads
- Fresh fruit
- Light summer meals
- Potluck tables
Storage Instructions
Store Classic Cherry Delight covered in the refrigerator for up to 4 days. This dessert is best kept chilled and does not freeze well due to the creamy layers.
General Information
Classic Cherry Delight is a beloved vintage dessert often found at family reunions, church potlucks, and holiday tables. Its simplicity, elegance, and refreshing flavor are exactly why it has stood the test of time.
Classic Cherry Delight FAQs
Can I make this ahead of time?
Yes! It’s actually better when made a day ahead.
Can I use low-fat cream cheese?
Yes, though full-fat gives the best texture.
Can I use homemade cherry topping?
Absolutely—just let it cool completely first.
Is this dessert very sweet?
It’s lightly sweet and nicely balanced by the cream cheese.
Conclusion: Why You’ll Love Classic Cherry Delight
This Classic Cherry Delight is creamy, cool, nostalgic, and unbelievably easy to make. It’s the kind of dessert that brings people back for seconds and sparks memories with every bite. Simple ingredients, timeless flavor, and zero stress—what’s not to love?
If you loved this recipe, you might also enjoy:
- No-Bake Blueberry Delight
- Peach Cheesecake Bars
- Strawberry Pretzel Salad
I’d love to hear how this turned out for you! Leave a review and don’t forget to share your photos on Pinterest—I truly love seeing your classic dessert creations.
Nutritional Information (Per Serving – Approximate)
- Calories: 320
- Fat: 18g
- Carbohydrates: 38g
- Protein: 4g
- Sugar: 24g
Tips for Success
- Soften cream cheese fully for a smooth filling.
- Chill thoroughly before slicing.
- Use a spatula to gently spread layers.
- For clean slices, wipe the knife between cuts.
- Make it the night before for best texture.
More Recipes You'll Love
All Dinner Dinner
Ham and Cheese Puff Pastry Pinwheels
Ham and Cheese Puff Pastry Pinwheels are one of those recipes I’m especially thankful to share with you—because they prove that simple ingredients can turn…
 Dinner
Street Corn Chicken Casserole
Street Corn Chicken Casserole is one of those recipes I’m truly grateful to share with you—because it brings bold flavor, cozy comfort…
 Dinner
Chicken Bacon Ranch Pasta
Chicken Bacon Ranch Pasta is one of those recipes I’m especially thankful to share with you—because it brings together everything we love in one comforting…
 Dinner
No-Bake Pumpkin Cheesecake Balls
No-Bake Pumpkin Cheesecake Balls are one of those recipes I’m truly grateful to share with you—because they prove just how magical fall desserts can be…
 Dinner
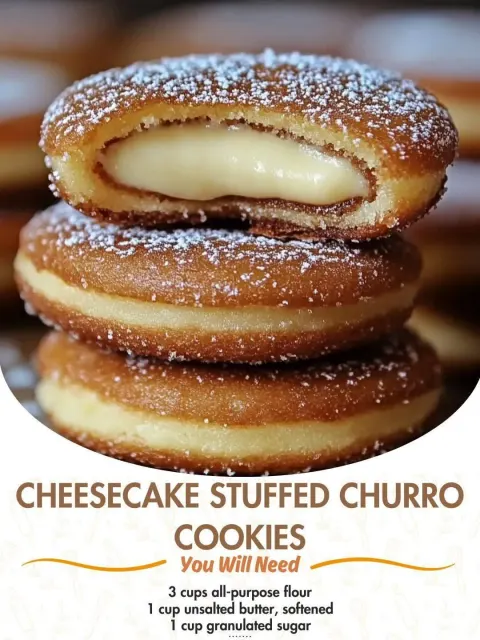
Cheesecake Stuffed Churro Cookies Recipe
Cheesecake Stuffed Churro Cookies Recipe—I’m genuinely so thankful you’re here for this one. This recipe is pure joy wrapped in cinnamon sugar…
 Dinner
French Dip Tortilla Roll Ups – Savory, Melty & Perfectly Dippable!
French Dip Tortilla Roll Ups – Savory, Melty & Perfectly Dippable! are one of those recipes I’m genuinely excited—and honestly grateful—to share with you.
 Dinner
Delicious Mexican Street Corn Dip Recipe
Delicious Mexican Street Corn Dip Recipe—I’m so thankful you’re here for this one. Truly. This dip is everything I love about sharing recipes: simple…
 Dinner
Garlic Butter Steak Lightning Noodles
Garlic Butter Steak Lightning Noodles are exactly the kind of recipe I’m so thankful to share with you—because it proves that big…